<em id="hoqkr"></em>
                1. <em id="hoqkr"><ol id="hoqkr"></ol></em>

                    Cubase AI重新授權教程

                    一、下載和安裝“eLicenser Control Center”

                    1、下載最新版本的“eLicenser Control Center”(如電腦中有,可直接打開):
                    http://www.steinberg.net/en/company/technologies/elicenser.html
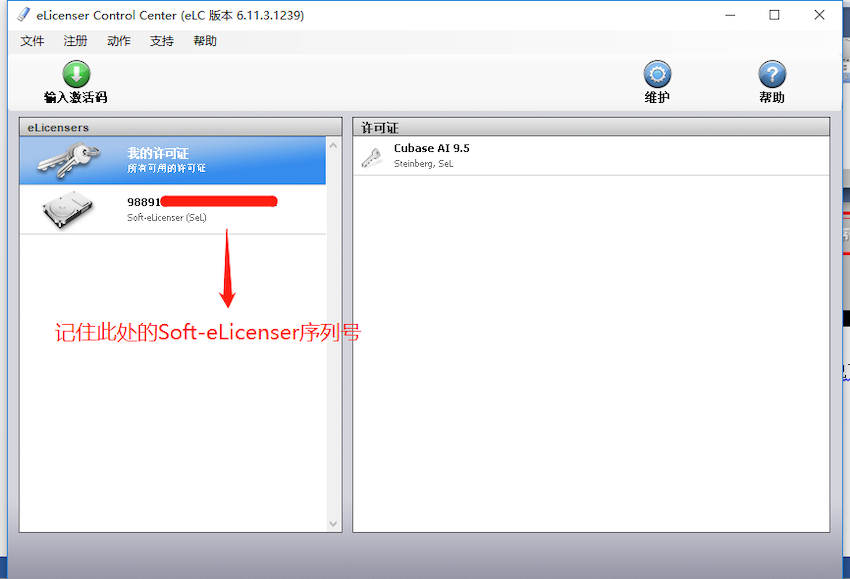
                    2、安裝完成后打開,并記住“Soft-Elicenser” 序列號:
                    Cubase AI重新授權教程

                    二、重新授權Cubase AI:

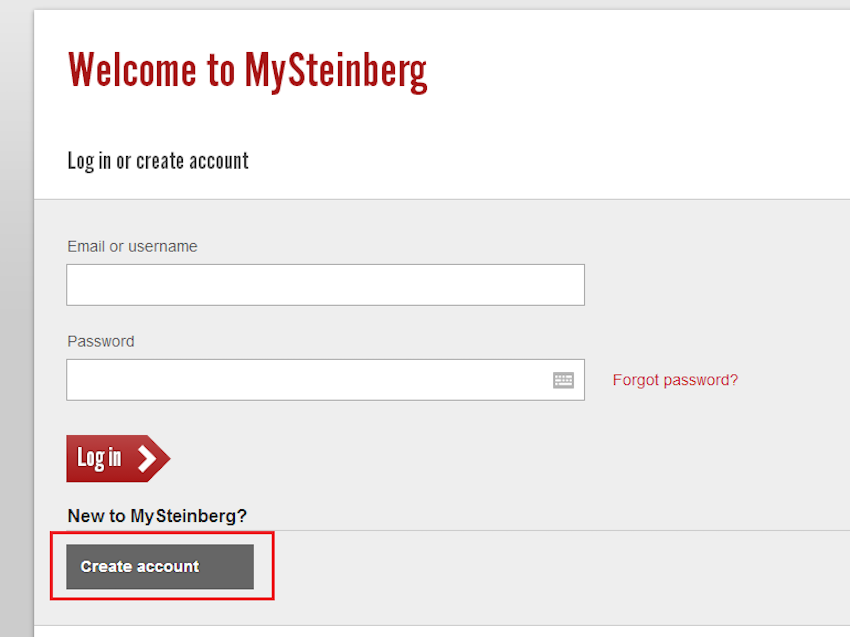
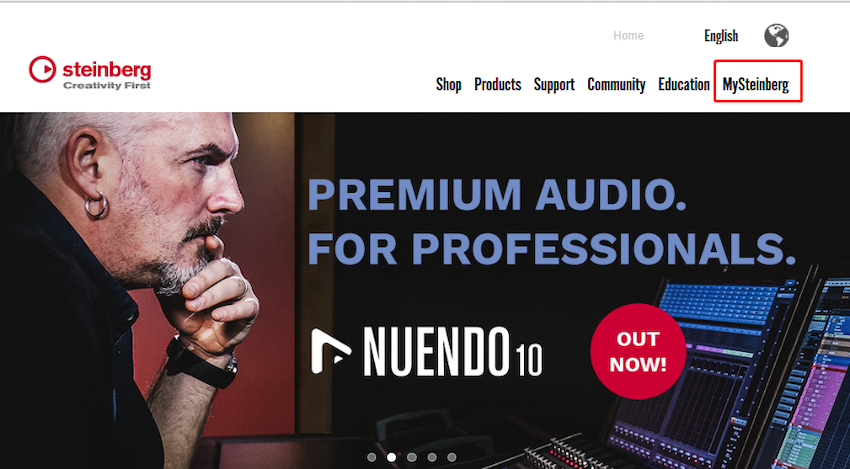
                    1、進入Steinberg官網:www.steinberg.net,點擊“My Steinberg”
                    Cubase AI重新授權教程

                    2、登陸MySteinberg賬號,進入用戶中心

                    Cubase AI重新授權教程

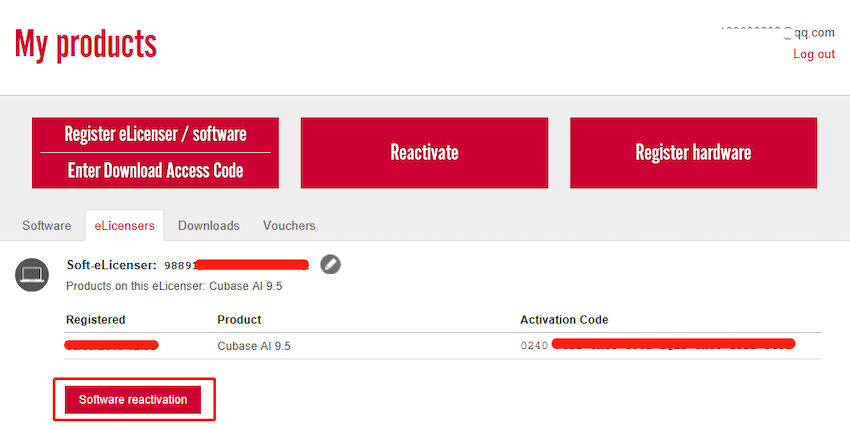
                    3、在“eLicensers”標簽頁面,選擇舊電腦的Soft-eLicenser,點擊“Software reactivate”鍵:
                    Cubase AI重新授權教程

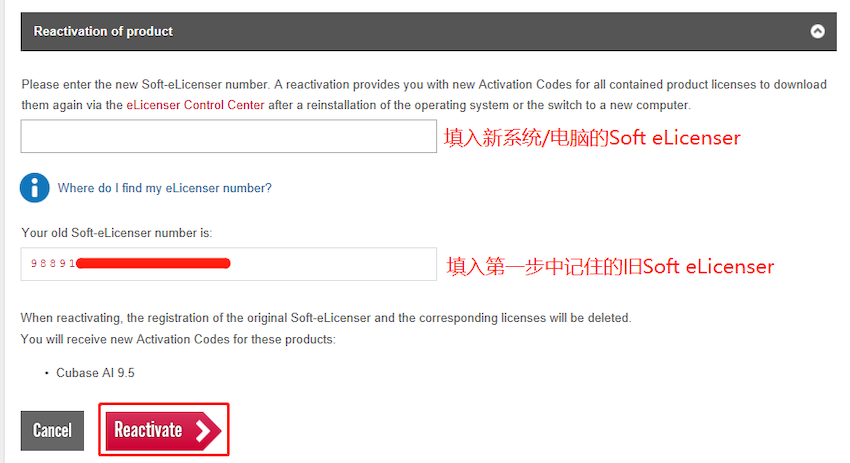
                    4、上面的框中填入新系統/電腦的Soft eLicenser,下面的框中填入第一步中記住的“Soft Elicenser”序列號,并點擊“Reactivate”:
                    Cubase AI重新授權教程

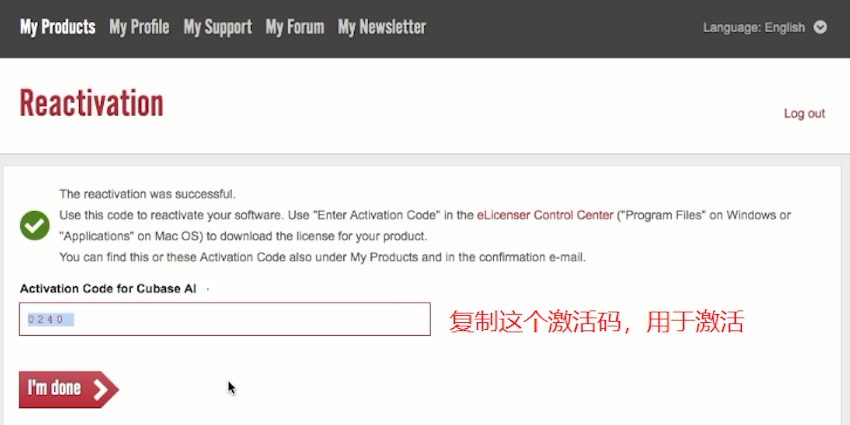
                    5、保存好出現的新的激活碼。

                    Cubase AI重新授權教程

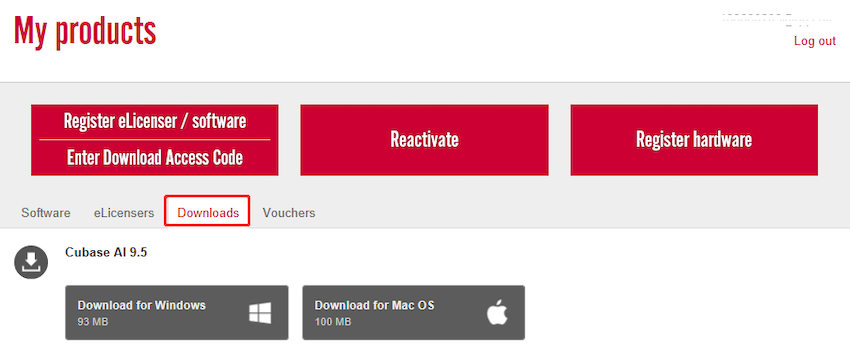
                    6、在“My Steinberg”中選擇“Download”一欄,并根據自己的系統下載和安裝Cubase AI:
                    Cubase AI重新授權教程

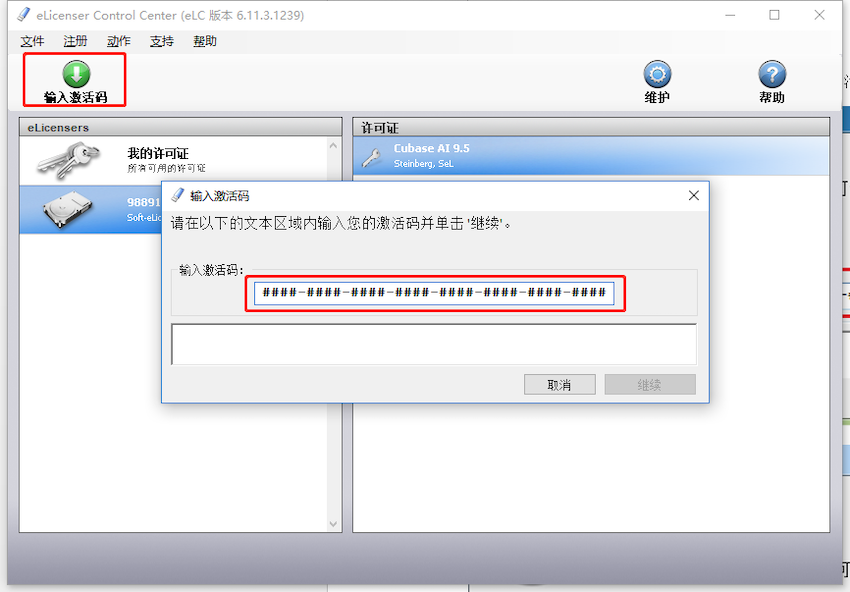
                    三、激活Cubase AI:

                    1、打開eLicenser Control Center,輸入激活碼,并激活許可證:
                    Cubase AI重新授權教程

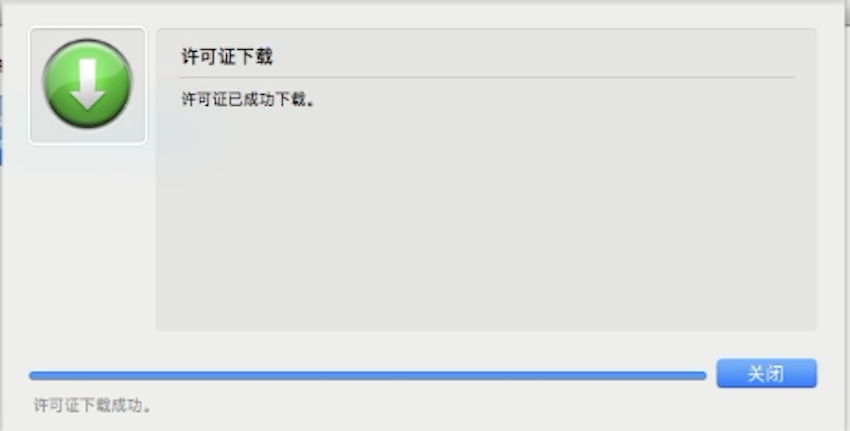
                    2、許可證下載成功:

                    Cubase AI重新授權教程
                    上一篇:關于Steinberg Zero Downtime的使用 2017年09月18日
                    下一篇:Cubase Pro / Artist / Element / AI注冊及安裝教程 2019年06月03日

                                <em id="hoqkr"></em>
                                1. <em id="hoqkr"><ol id="hoqkr"></ol></em>
                                    lunlipian